
Now that most of the US (and the world) is under quarantine, communication has largely shifted to live stream video services like Skype, FaceTime, and Zoom. And while it’s easy to initiate or join a live video stream while working from home, with just a little effort, you can make the quality of your WFH live stream setup look a lot better.
In this hands-on walkthrough, we’ll discuss some basic tips that you can use to improve your live-streaming setup while under lockdown.
There are a few things you’ll need to consider when it comes to improving the quality of your video streams, and I’ve highlighted them below. Of course, there are always other tips and techniques that you can employ as well, but these are a few basics that may help you get started.
Lighting
Good lighting is by far the most important item on this list. You can have the best camera in the world, but if you’re poorly lit, it’s not going to matter. Conversely, even less-than-stellar cameras will look passable when the subject is well lit.
Top ways to improve your WFH live stream setup
Subscribe to 9to5Mac on YouTube for more videos
While it’s nice to have dedicated lights specifically for on-camera work, that doesn’t necessarily mean you have to go out and purchase a bunch of lights in order to improve your lighting for live streaming. Often, just having enough light is good enough to make a difference, and don’t forget that one of the best natural light sources — the giant fireball in the sky called the Sun — is free for you to use during the day.

Bouncing light off foam core board
If your lighting is limited, take advantage of bounced light. This can be achieved by bouncing a single light source off of a light areas. You can use many things to bounce light, such as foam core, a white sheet, wall, ceiling, etc.
I’m far from a lighting expert, but there are some great resources available on YouTube. One such resource is DSLR Video Shooter by Caleb Pike. It features an excellent playlist that explores all of the ins and outs of lighting in-depth. Highly recommended.
Camera
If you’re using the webcam on your MacBook, you may come away disappointed. Every new MacBook that Apple ships features at least a 720p FaceTime HD camera, and the iMac Pro features a 1080p FaceTime HD camera, but none of them produce what I would call stellar-looking video. Worse yet, older MacBook models feature 480p cameras.
But if that’s all you have at your disposal, you can still make it work fairly well. With lesser cameras, lighting will end up being even more crucial. If you’re trying to live stream video from a laptop camera, make sure that you have an abundance of light.
Better yet, you could opt to use your iPhone’s camera, since modern iPhones feature much better front-facing cameras that the one’s you’ll find in most laptops or tablets. If at all possible, use your iPhone instead of your MacBook, and you’ll notice a substantial quality increase.
If you have the resources, you can greatly improve the quality of your live video by using a mirrorless camera with an interchangeable lens. Not only will such a setup be able to gather much more light than a laptop or smartphone camera, but you can also change the aperture to lend a shallower depth of field.
Besides just looking better from a clarity perspective, having a standalone camera setup can be very helpful is your background isn’t very ideal. The downside is that this method requires some additional hardware, such as a video capture card or dongle. I will explore some examples of this method in a future post and video.
Framing
The biggest thing that you can do when it comes to framing is to make sure your face is in the frame. I’ve been on a lot of live streams where the participant’s faces were cut off, or perhaps they were looking straight down at the camera because their phone was placed flat on a table. Simply making sure that your video is framed right can go a long way towards improving your video.
Placing your MacBook at eye level can help enhance framing
One trick that I like to use is to utilize the stock camera app or an app like Photo Booth on Mac to test out your framing using the front facing camera prior to going live. That way, you can get a ballpark idea of what others will see before even joining the live stream.
Background
Speaking of framing, you’ll want to ensure that your background isn’t overly distracting. Realistically speaking, not everyone can make it seem like they’re in a production studio while at home, and not everyone has access to a green screen and chromakey tools needed to create a decent fake background. We’ll explore that in an upcoming post, however.
The main thing is to just be mindful of your background. Will people be walking in and out of the frame? Is it distracting or overly casual looking? Are you shooting video in your kitchen with dishes in the background?
If you don’t have the resources on hand to pull off a nice background, a good rule of thumb here is to just be as simple as possible. If push come to shove, a blank wall is good enough to get the job done, but you can get creative by using things like curtains, sheets, etc.
Sound
Probably one of the most overlooked characteristics of a good live-streaming setup revolves around sound quality. That’s understandable, because good sound setups can get quite unwieldy and costly.
If you want to take it to the next level, you can connect something like the Apogee MiC+ to improve your sound quality, and if you really want to bump up the quality you can use a dedicated audio interface like the Universal Audio Arrow paired with a standalone microphone.
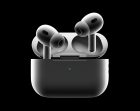
AirPods help remove echo/feedback loop, and feature a decent microphone
Personally speaking, however, the convenience of using Bluetooth earbuds is just too good to overlook. I’m a big fan of simply using AirPods Pro. They don’t include the nicest-sounding speakers or microphone, but they do a decent enough job, and are incredibly simple to use with Macs and iOS devices.
Above all, try not to rely on the onboard speaker and microphone of your Mac or iPhone. Doing so can result in a feedback loop (echo) and even more echo from your voice as the wavelengths struggle to reach the microphone on your Mac or iPhone. Having a microphone closer to your mouth is the more ideal setup.
Network connection
If possible, use a hard-wired Ethernet connection instead of Wi-Fi. This will ensure that you get the best-quality connection, which can help reduce lag, stutters, delays, etc. Although it’s possible to connect an iPhone to Ethernet, realistically speaking, it’s far more likely that you’ll be able to connect your MacBook to Ethernet.
If possible, use an Ethernet connection
Although modern MacBooks don’t have Ethernet ports, you can pick up a check USB-C to Ethernet adapter for a quick and easy hard-wired connection. If you’re using a Mac mini, iMac, iMac Pro, or Mac Pro, you’ll be able to connect directly to Ethernet without needing an adapter.
9to5Mac’s Take
I wouldn’t expect you to use all of these tips to improve your live video while on lockdown, but even if you strive to just use 2-3 tips on this list, it’ll go a long way toward boosting the quality of your video. Not only will you have a better time with WFH live streams, but your audience will no doubt appreciate the effort as well.
What do you think? Do you have any other live streaming tips of tricks to share? Sound off in the comments with your thoughts and opinions.
FTC: We use income earning auto affiliate links. More.


Comments