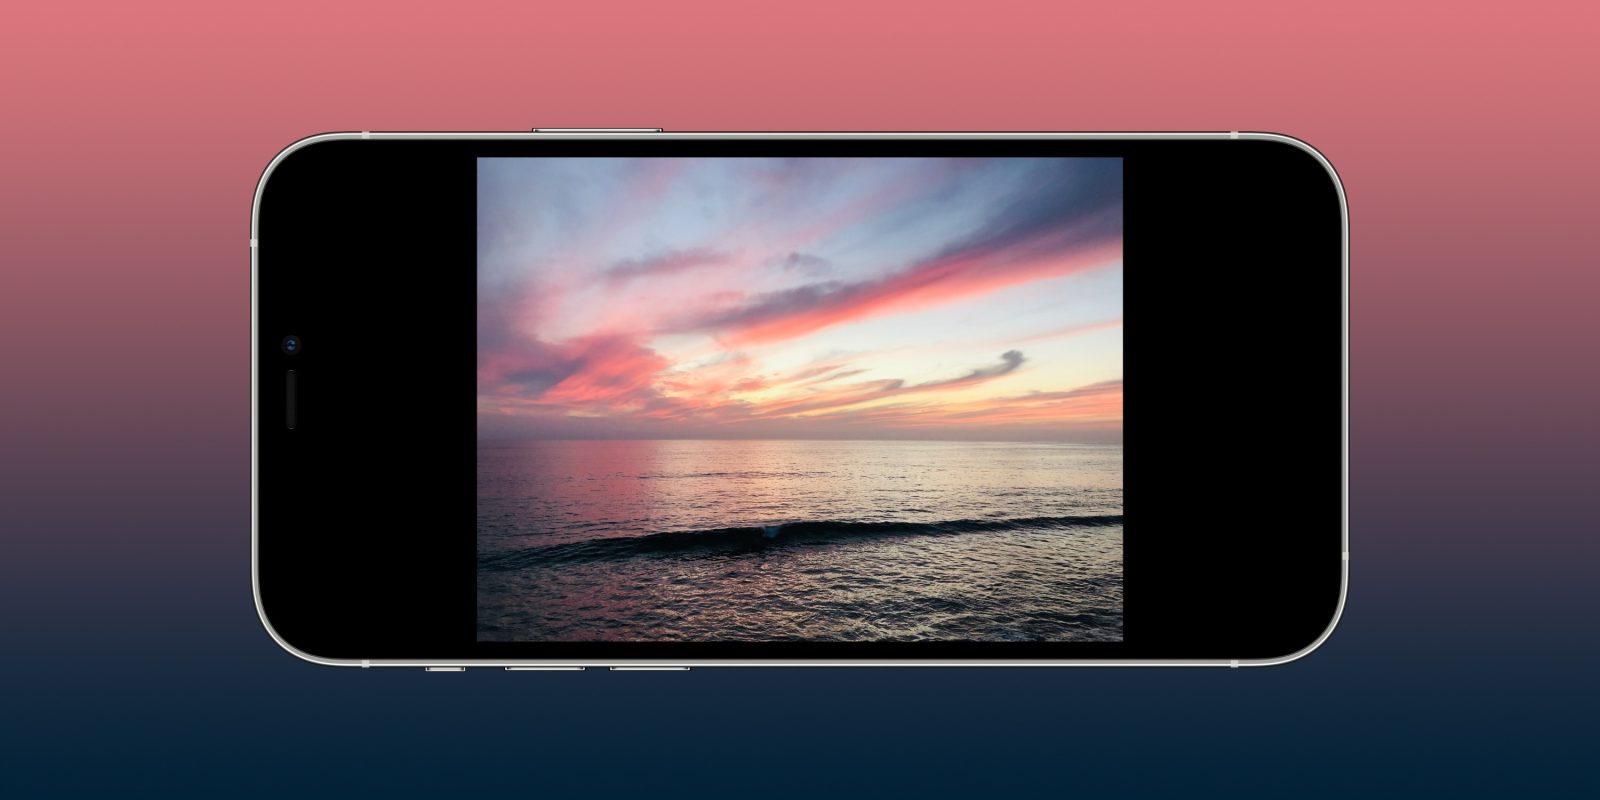
Sick of seeing pillar/letterboxes when you go to share pictures on social media and elsewhere? Read along for how to quickly remove iPhone photo black bars as well as how to prevent them.
If you notice photos showing up smaller than others in your iPhone camera roll and see black pillar/letterboxes on images when you share, it’s likely that you’ve taken a screenshot of an image (or someone else has).
Here’s what’s happening: iPhone and many other smartphones take photos in the 4:3 aspect ratio by default (or 16:9), but the screen on modern iPhones uses a 19.5:9 ratio. That means anytime you look at a photo without zooming in, it’s not going to fill the entire iPhone screen, so when you take a screenshot of an image to share, it’s going to include the black bars on the sides (or top and bottom).
Keep in mind you can avoid this by sharing the original photo(s), but if that’s not possible, follow along for a few options.
How to remove iPhone photo black bars
When taking a screenshot
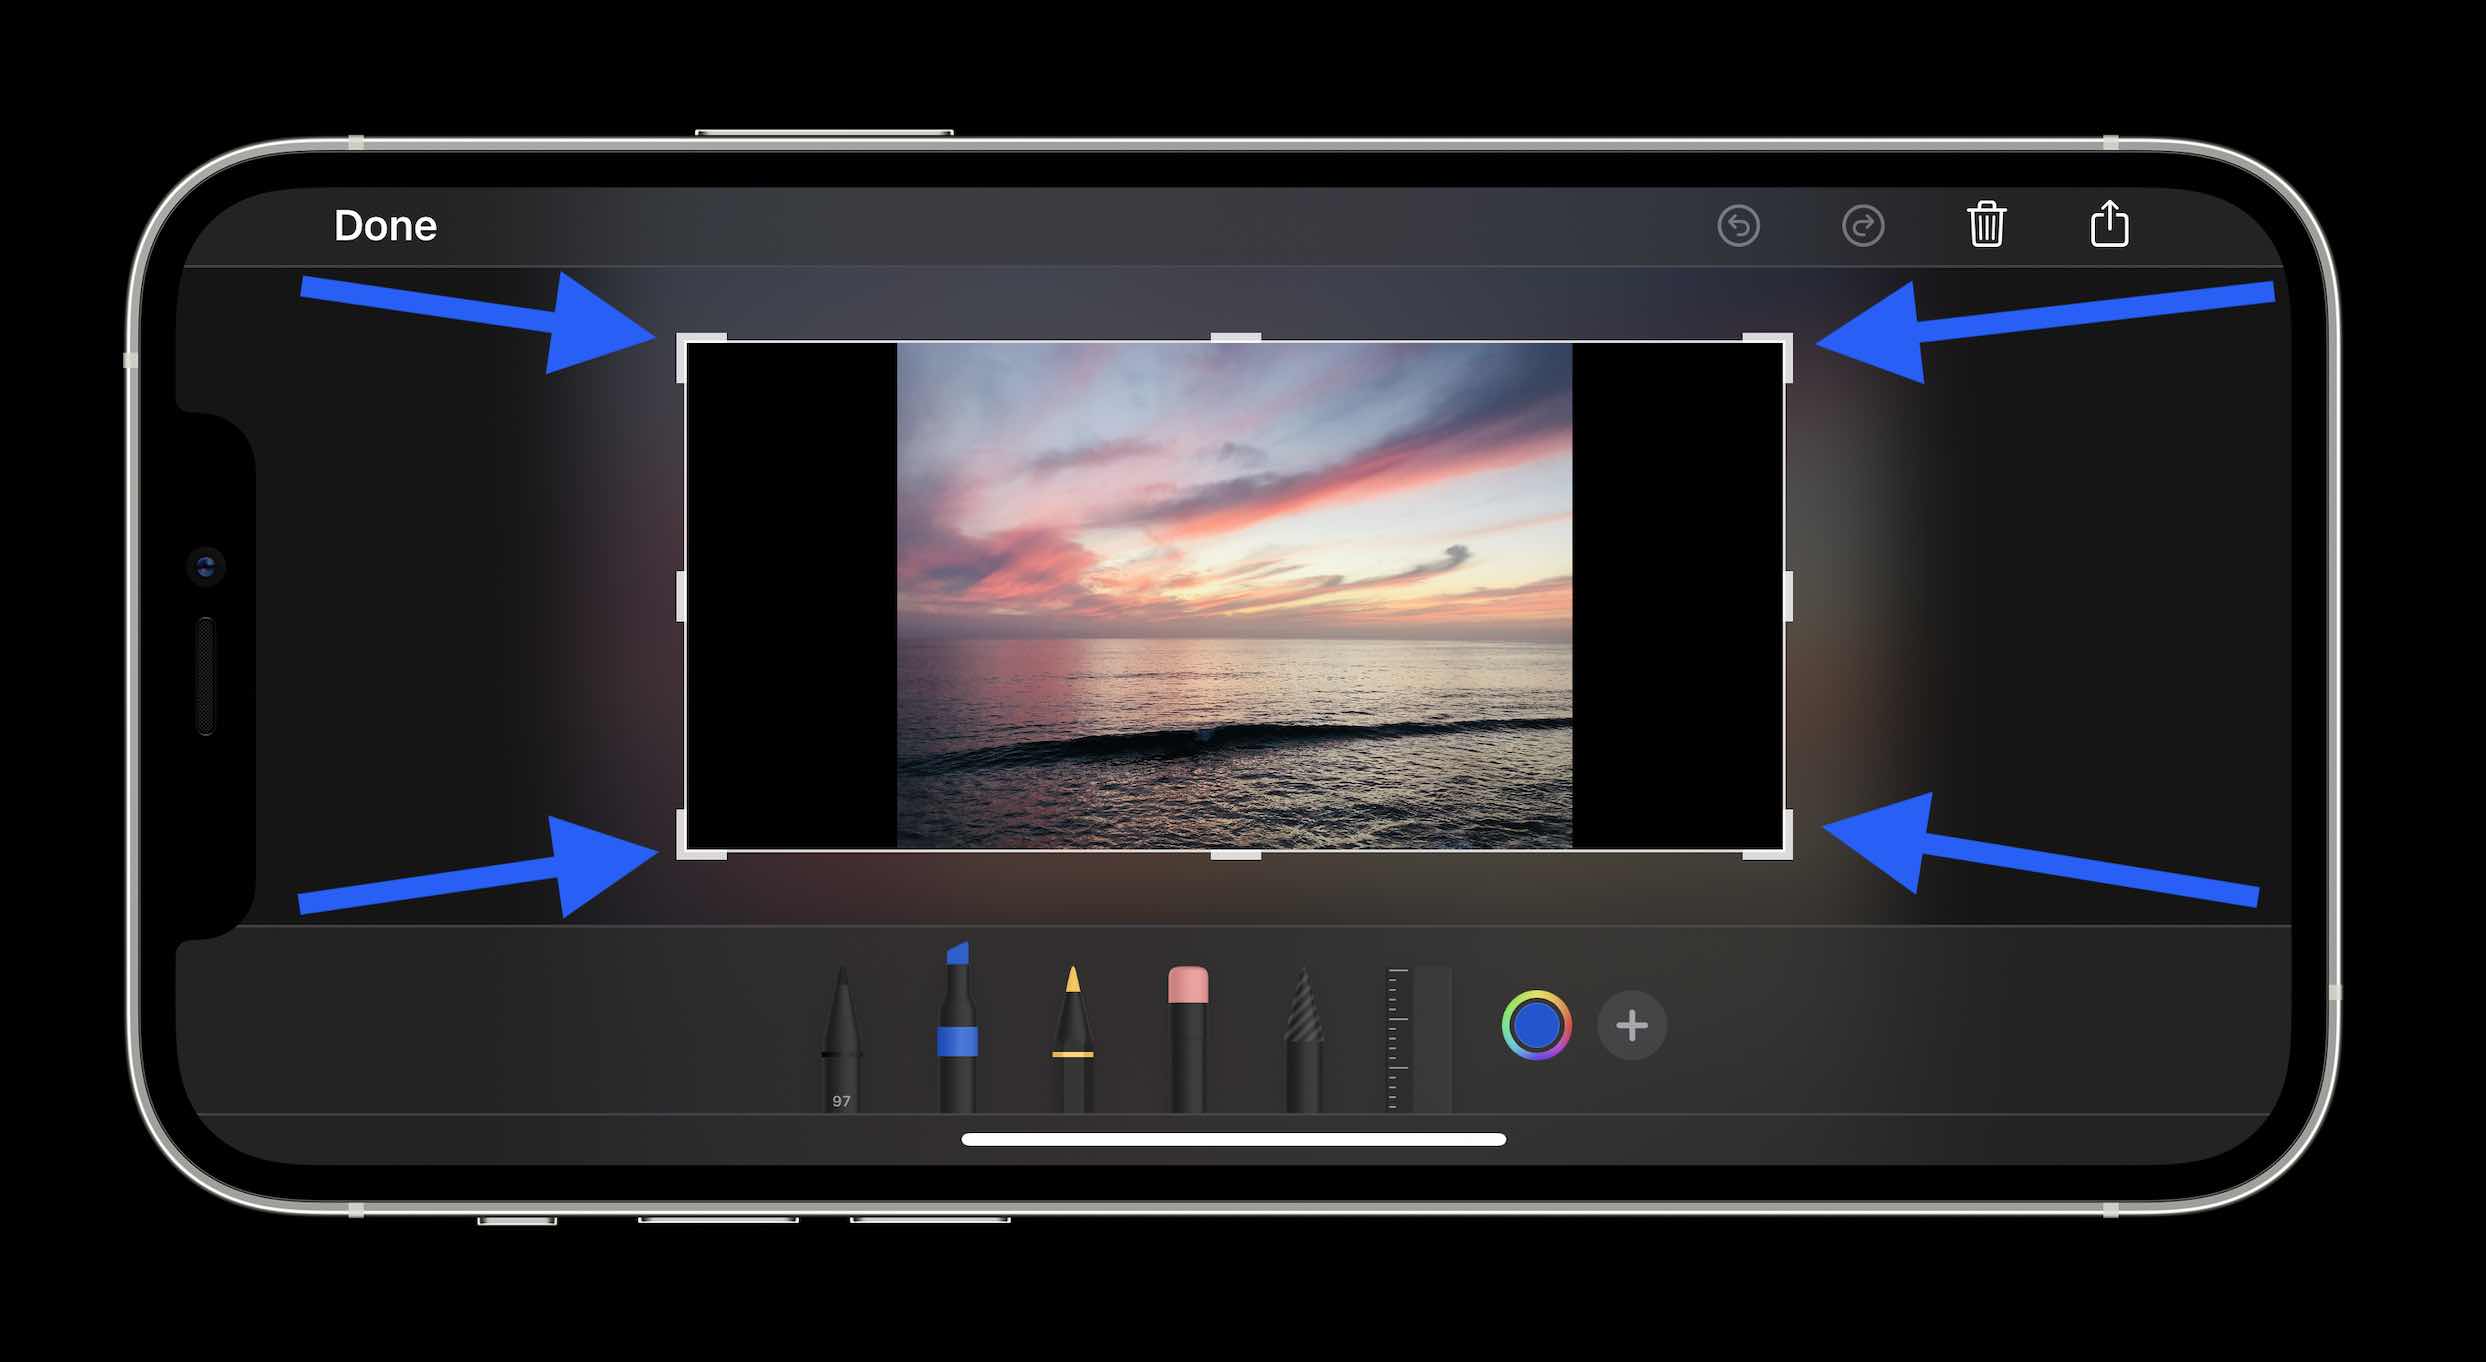
- If you’re taking a screenshot and want to share it, you can edit the black bars out as part of the process
- Take your screenshot (press the side button and volume up at the same time)
- Tap the screenshot image preview in the corner of your screen to enter edit mode
- Drag the white corners of the image to crop out the black bars
- Tap Done in the corner
- Choose “Save to Photos”
Now, you can find the photo without pillar/letterboxes in your Photos app to share, etc. Here’s how this looks:
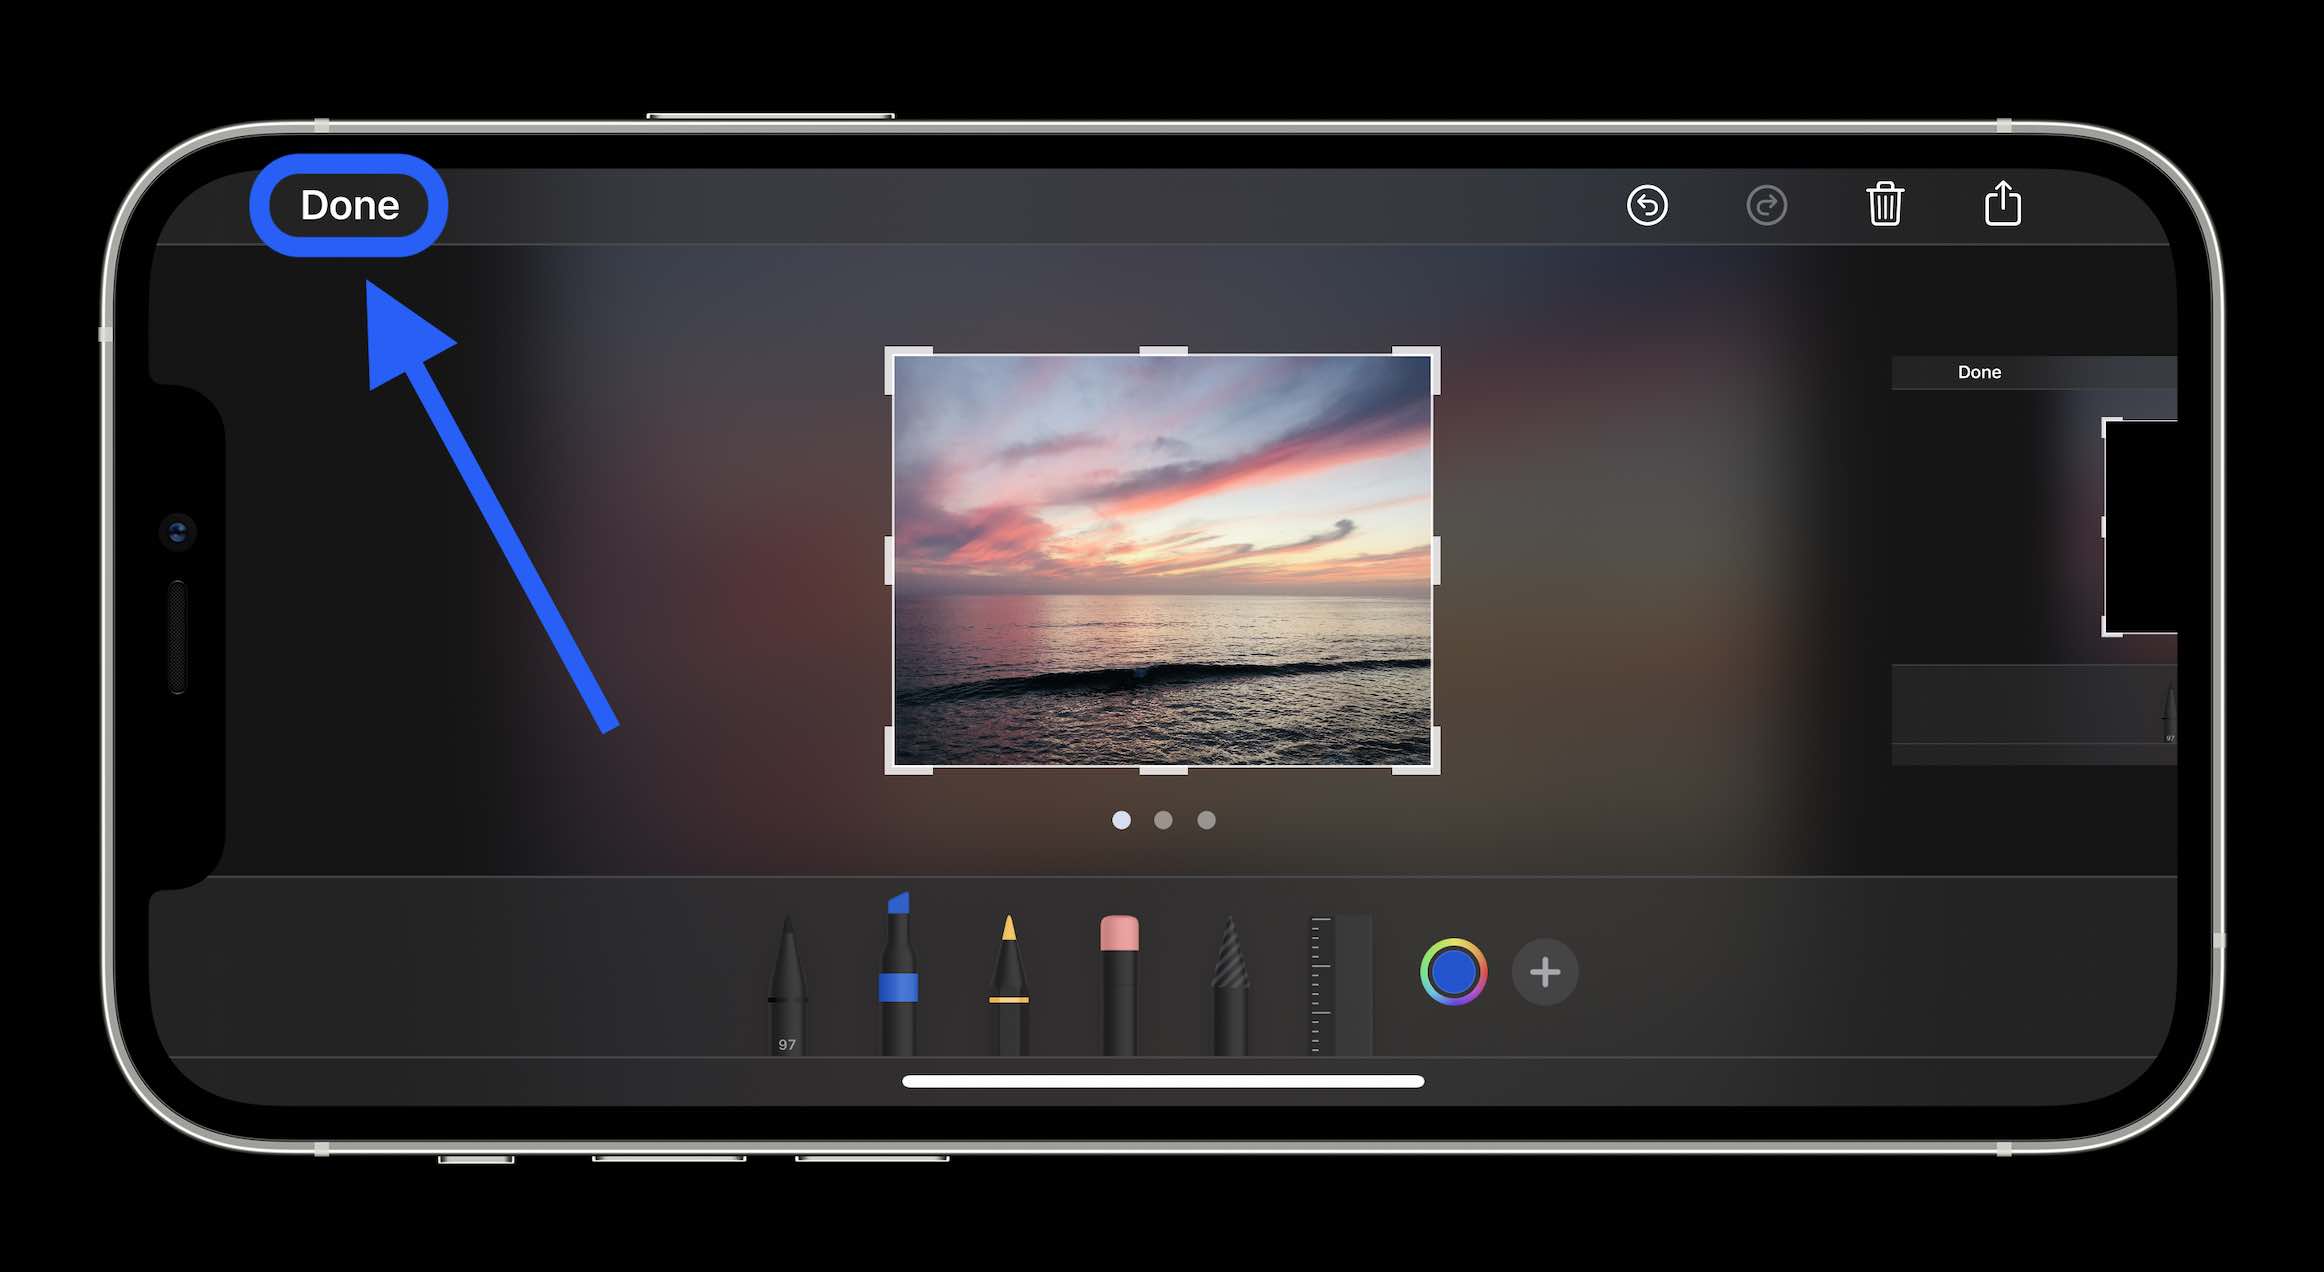
The last step is to choose where you’d like to save the cropped photo.
Remove iPhone photo black bars after the fact
If you already have an image in your Photos app with black bars
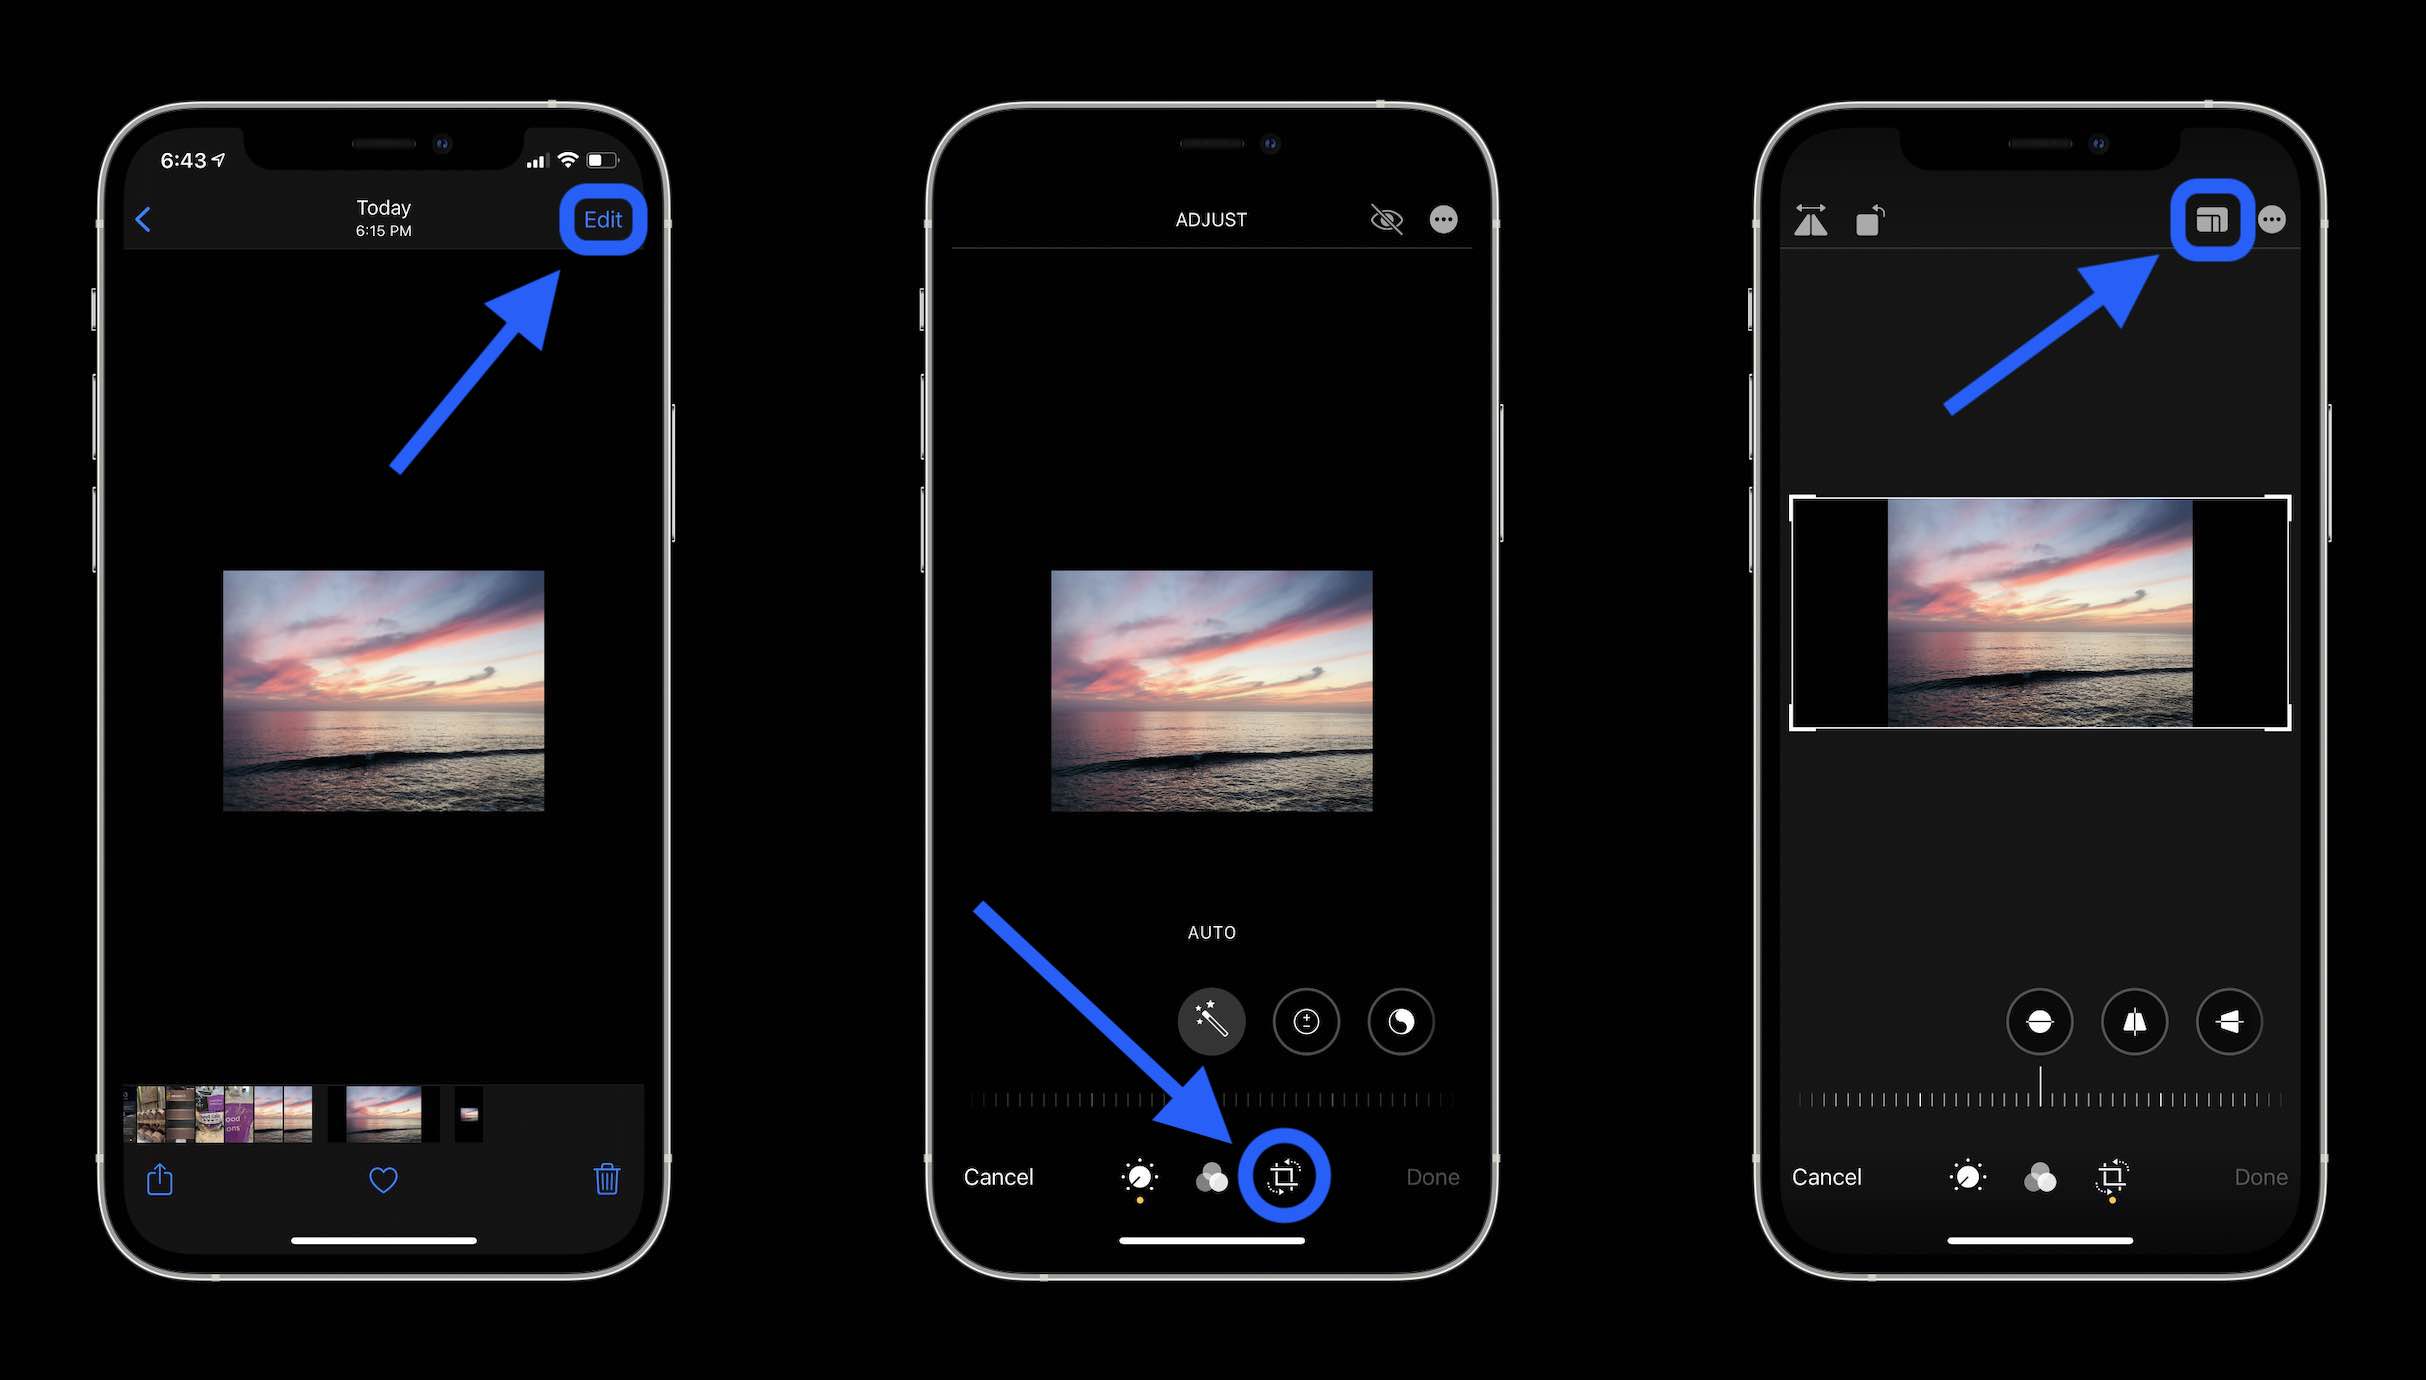
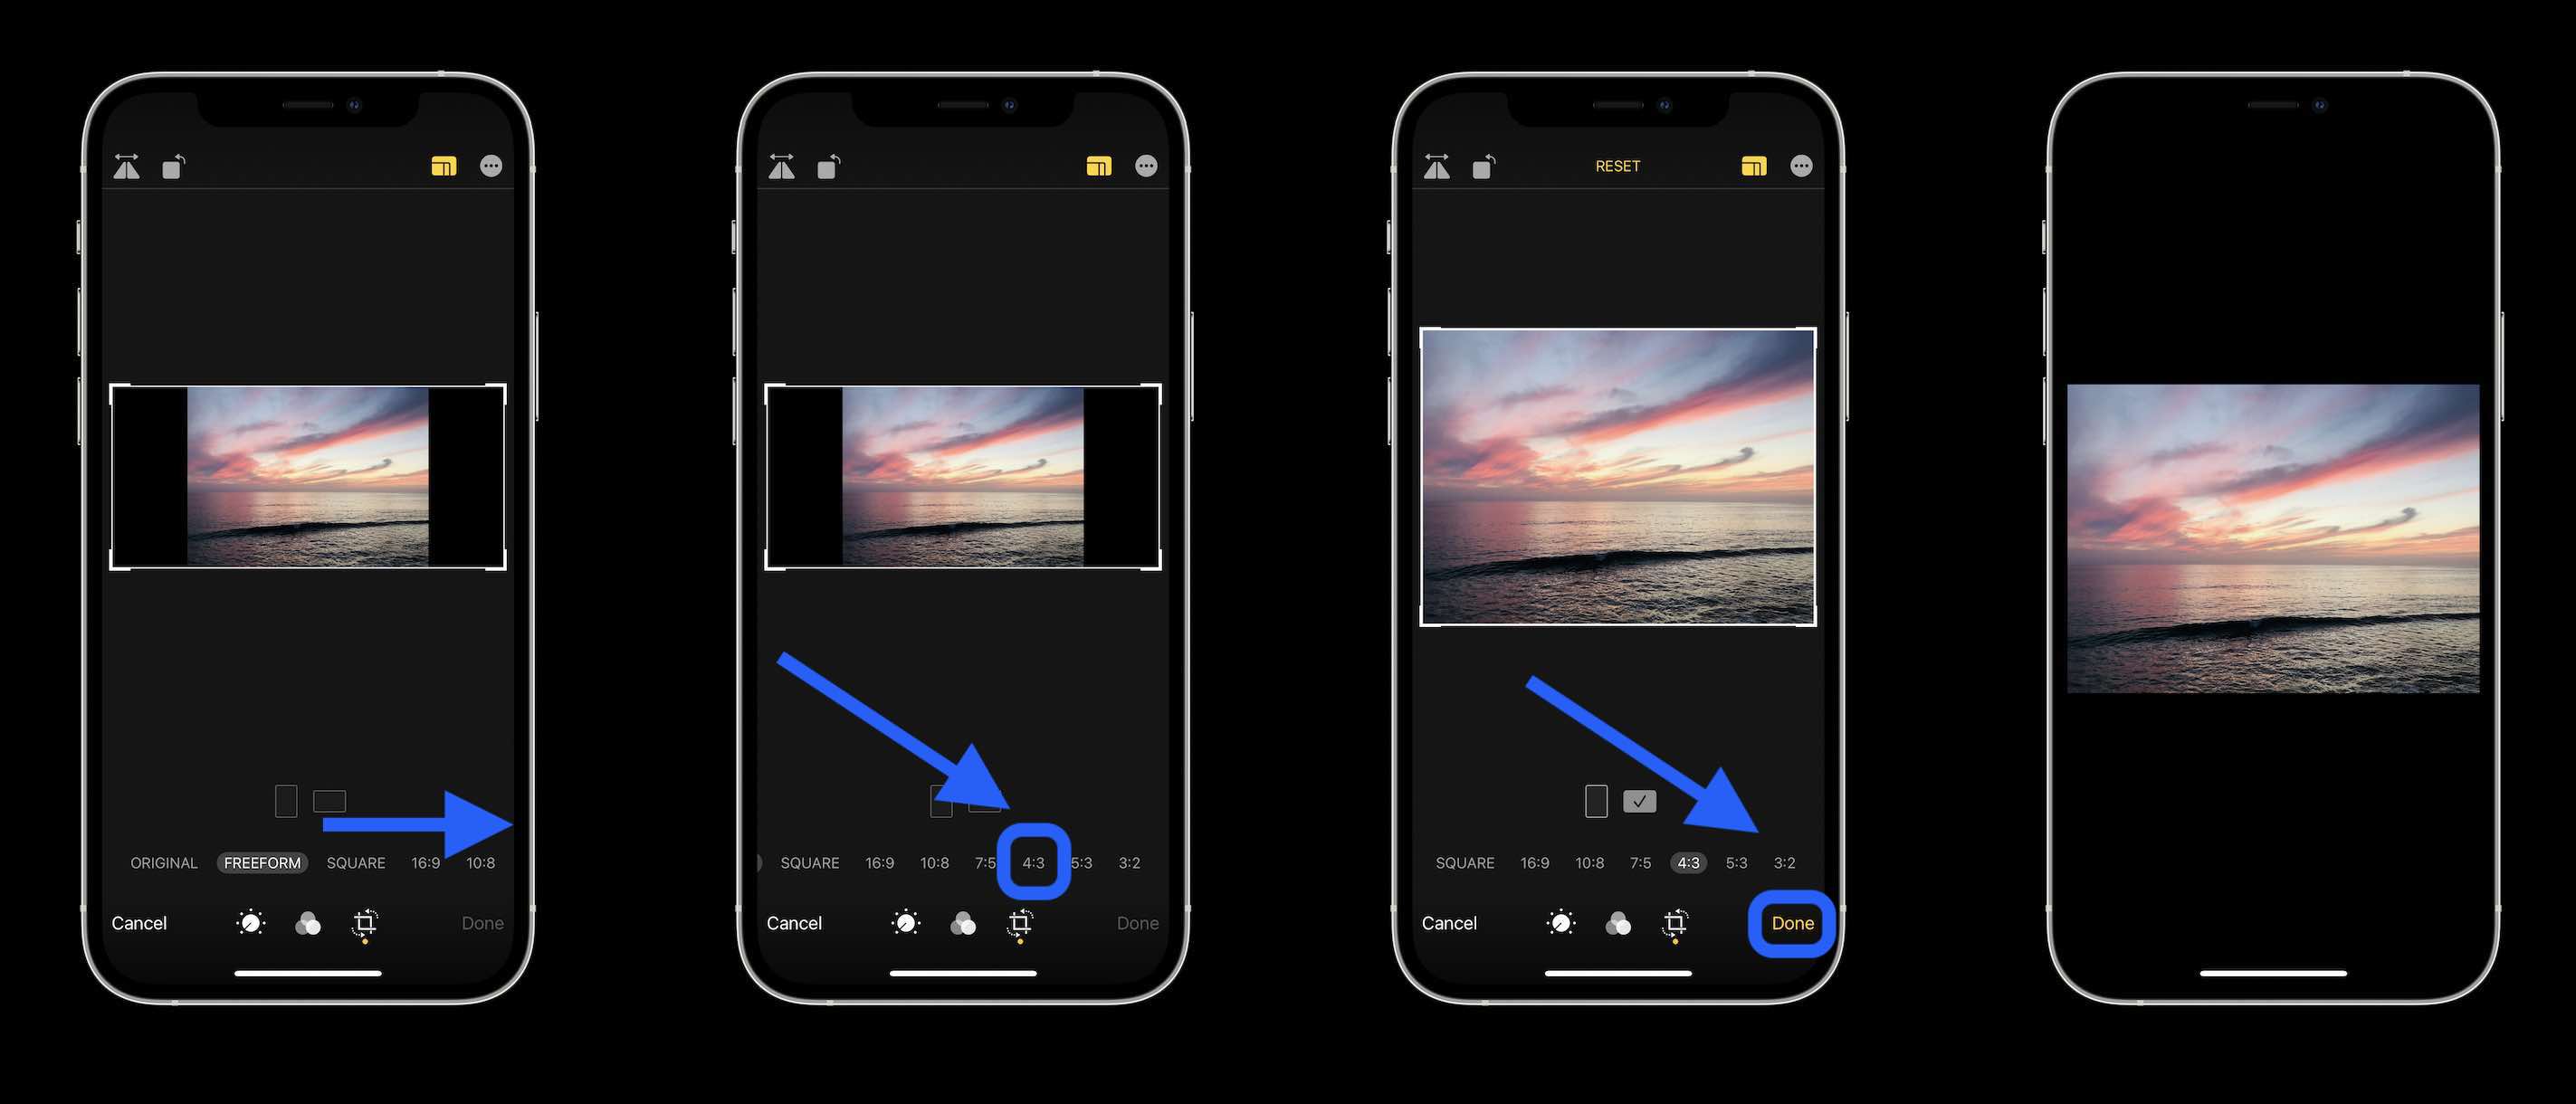
- Tap the photo > then Edit in the top right corner
- Now tap the crop/resize/rotate tool at the bottom (square-ish with arrows icon)
- Now in the top right corner, tap the ratio resize tool (multi-shaped rectangle icon)
- At the bottom on “Original, Freeform, etc.” swipe from left to right
- Tap on 4:3, then Done in the bottom right corner
You can follow the same steps as above in the Photos app on Mac or other photo editing apps.
Read more 9to5Mac tutorials:
- How to use and find dynamic Mac wallpapers, make your own, more
- How to type the Apple logo on Mac, iPhone, and iPad
- How to use the Magic Keyboard shortcuts on the iPad Air and iPad Pro
- iPhone & iPad: How to clear cache, history, and cookies
FTC: We use income earning auto affiliate links. More.


Comments