iOS 15 brings with it a number of notable changes including improved notification handling, Focus modes, and redesigned apps like Weather and Maps. Perhaps the largest change with iOS 15 is the new FaceTime experience which now offers screen sharing, Windows and Android access, and more.
Apple has brought Spatial Audio and Portrait mode to FaceTime calls. The new SharePlay features allow users to watch TV shows and movies or listen to music together. Using SharePlay, you can also share a live view of your screen to the call. These are great features for users on iOS and macOS, and with FaceTime links bringing web support, Apple customers won’t be the only ones on FaceTime calls any longer.
While we may not have a long-requested FaceTime for Android app, iOS users can create a link to a FaceTime call that can be accessed through a standard web browser on a mobile or desktop device. The web app doesn’t have all the features that have been brought to FaceTime with iOS 15, but you can share your screen with an extra piece of software.
Screen sharing to FaceTime from Windows with OBS
OBS (Open Broadcaster Software) is an open source piece program that was created for video recording and live-streaming from a variety of devices to almost any platform. The plugin “VirtualCam” was created to allow the software to appear through other applications as a normal webcam, and recently this plug-in was integrated into the main build of OBS. With OBS we can share our screen on a Windows device to a FacTime call.
To start, just download OBS and install it on your computer.
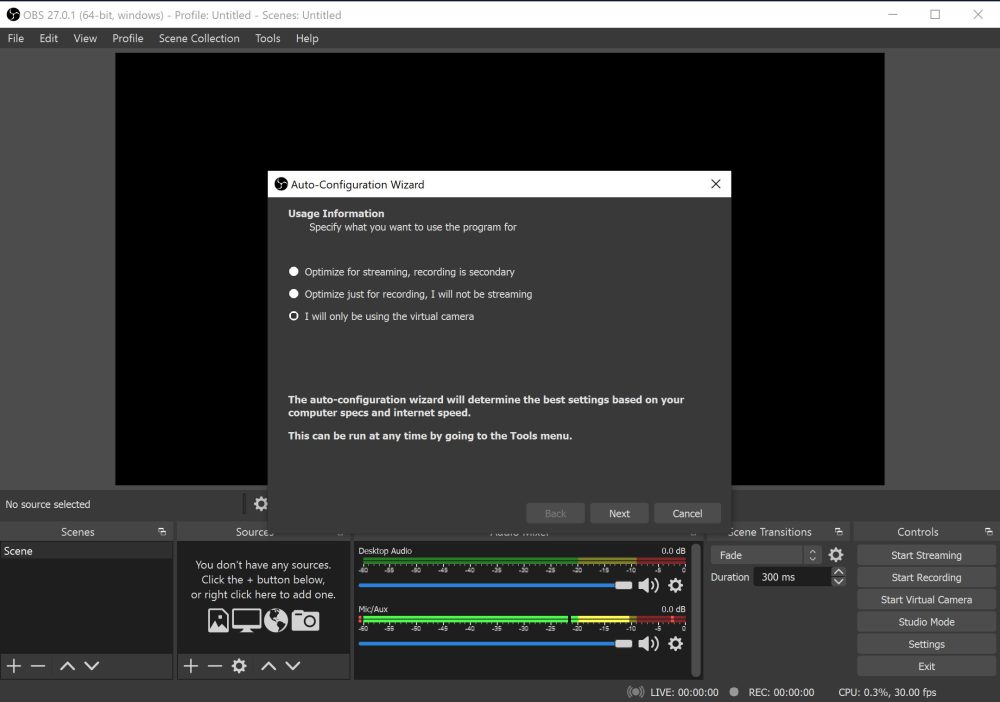
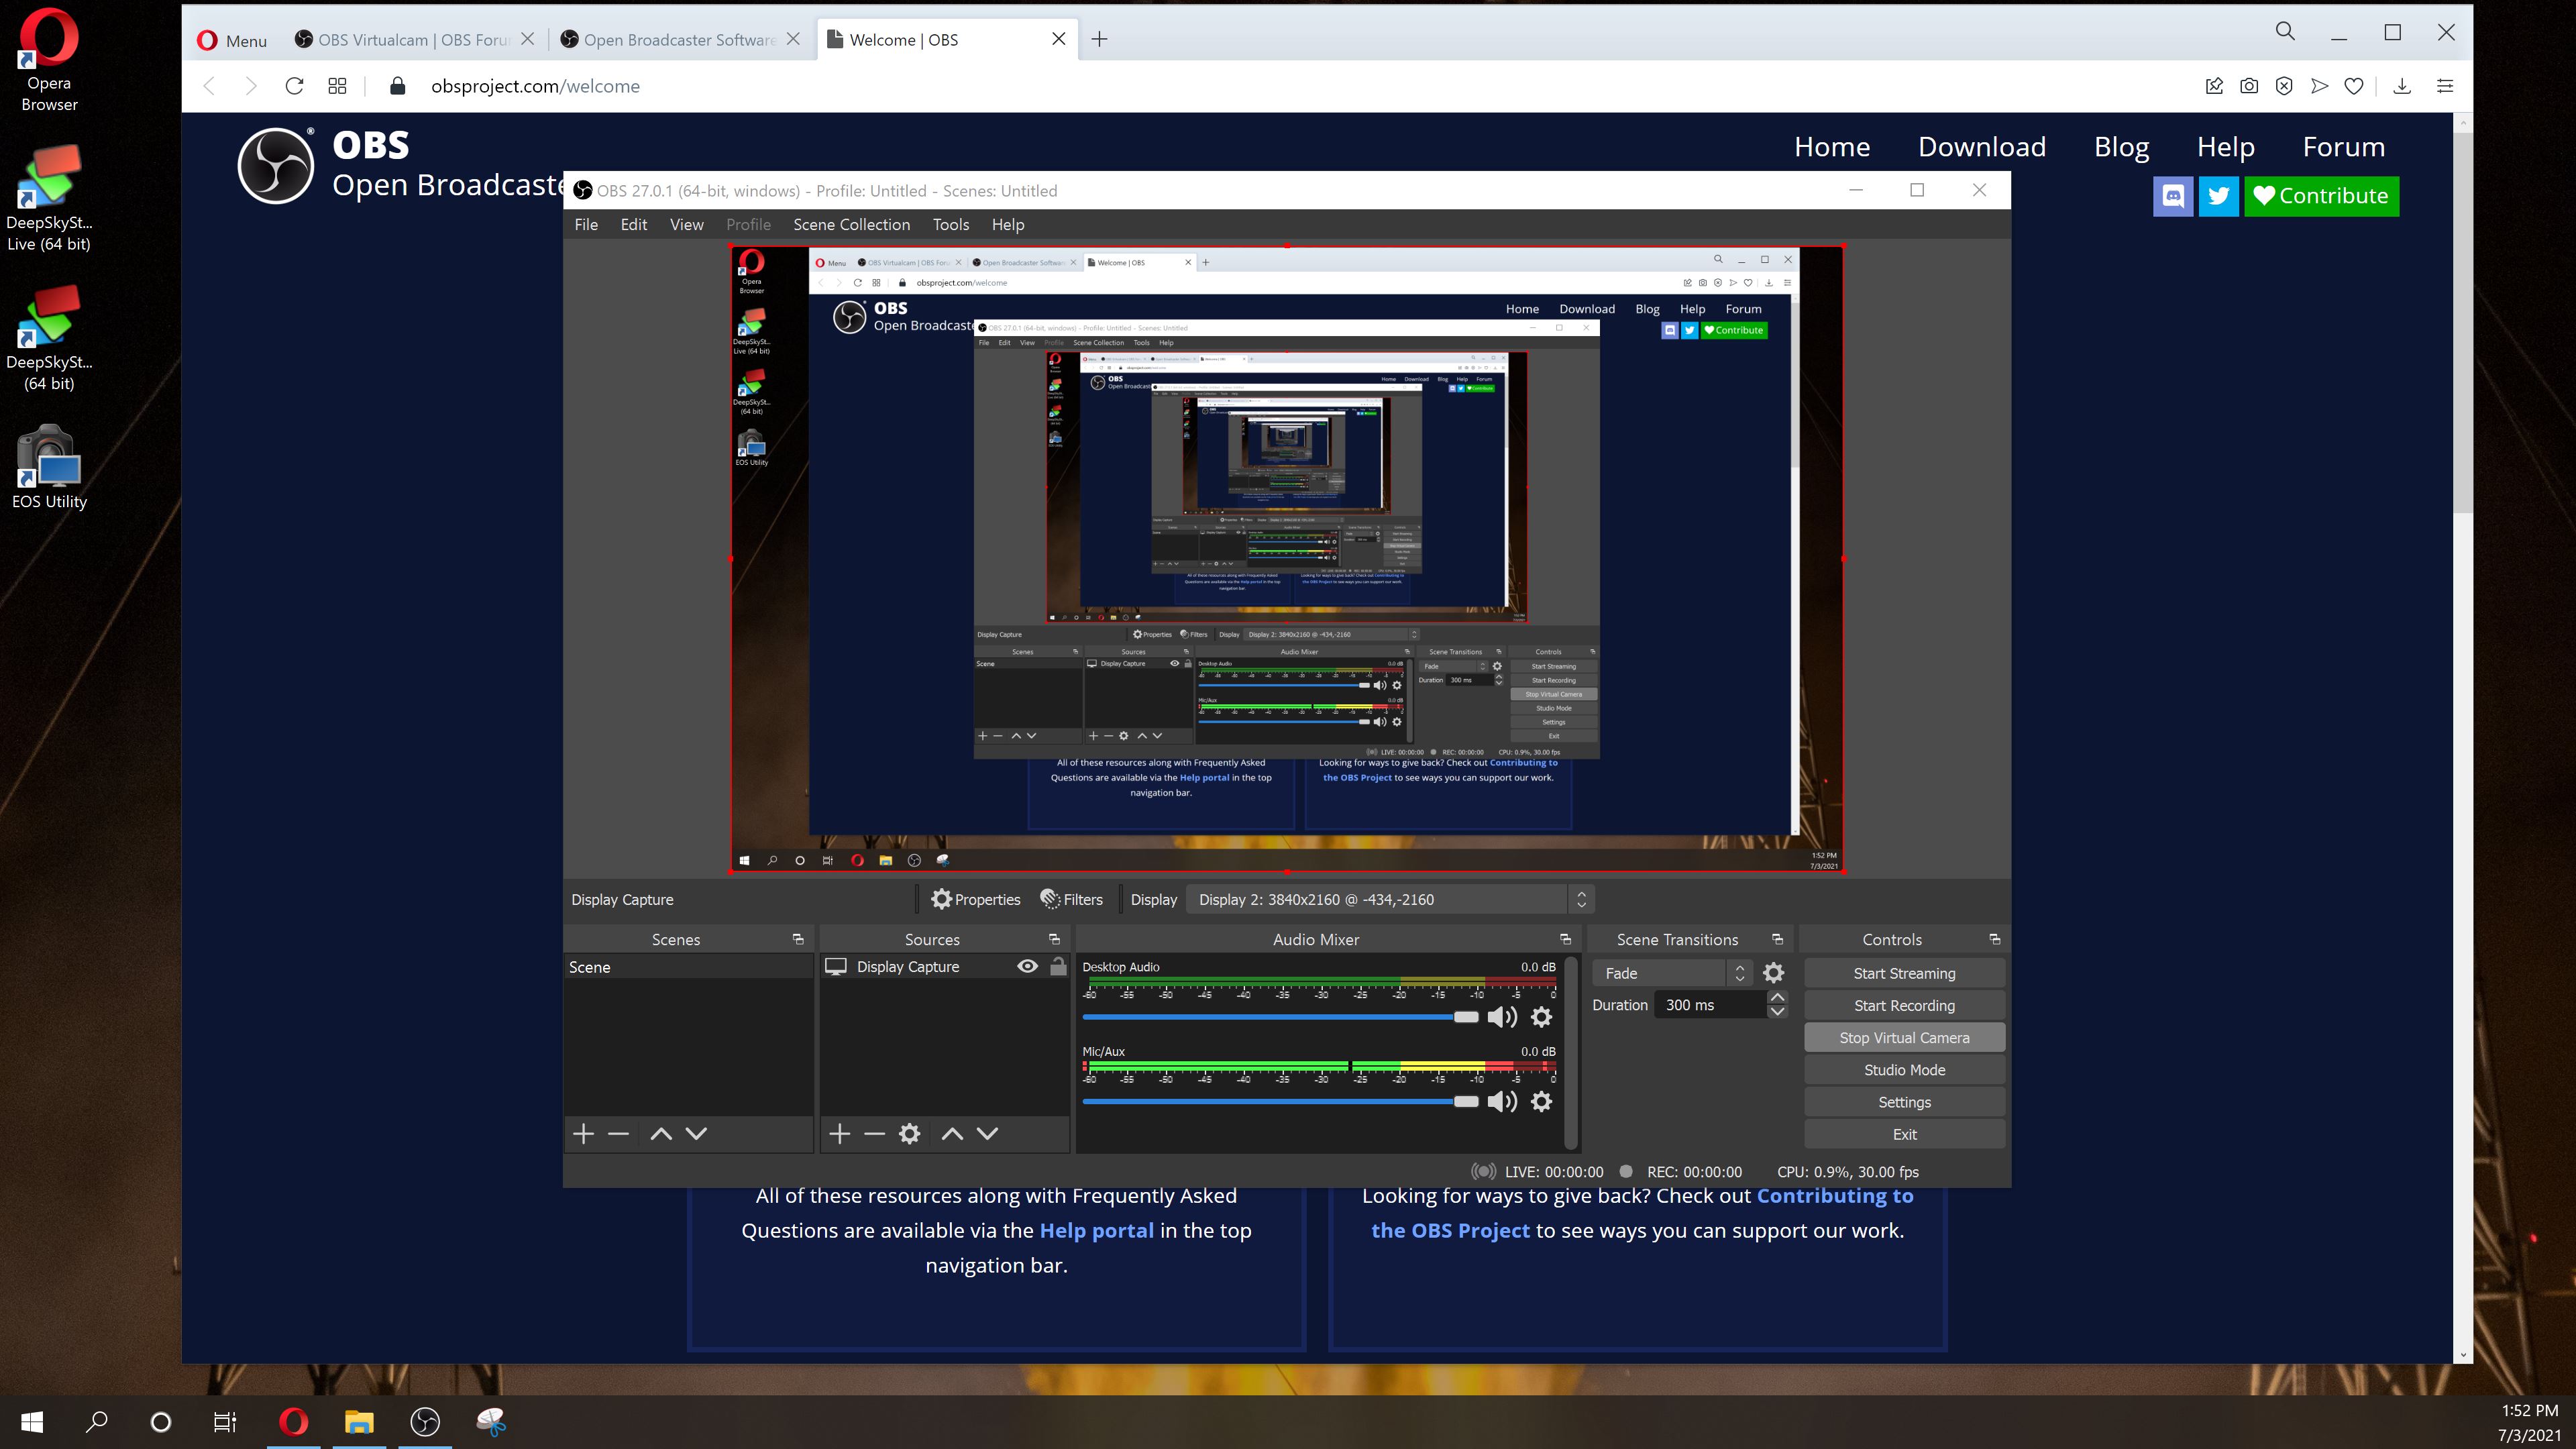
When you open OBS for the first time, you will be presented with an Auto-Configuration Wizard. OBS is a powerful piece of software and it looks complicated, but running it as a virtual camera is simple. Just select “I will only be using the virtual camera”. OBS will then automatically recommend the quality settings for your computer so just click next.
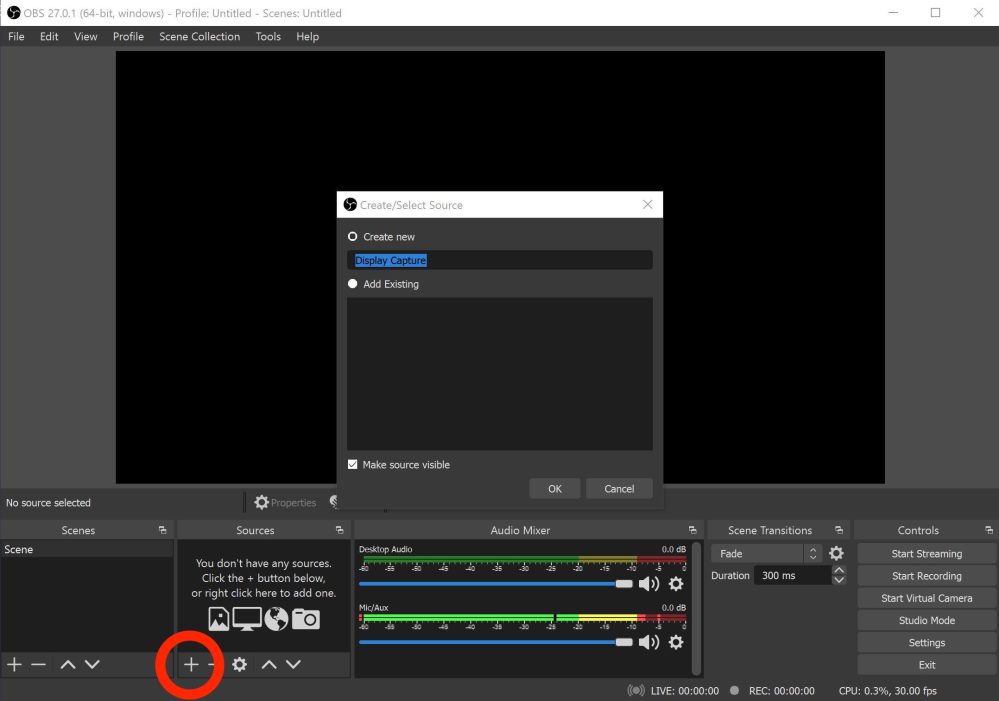
To start capturing your display, select the “+” under sources and select Display Capture. You will then be shown the “Create Source” window. Just click OK to create a new display capture.
This will open a new window. If you have multiple displays connected to your computer, you will need to select the display you wish to capture under the “Display” selection then click okay.
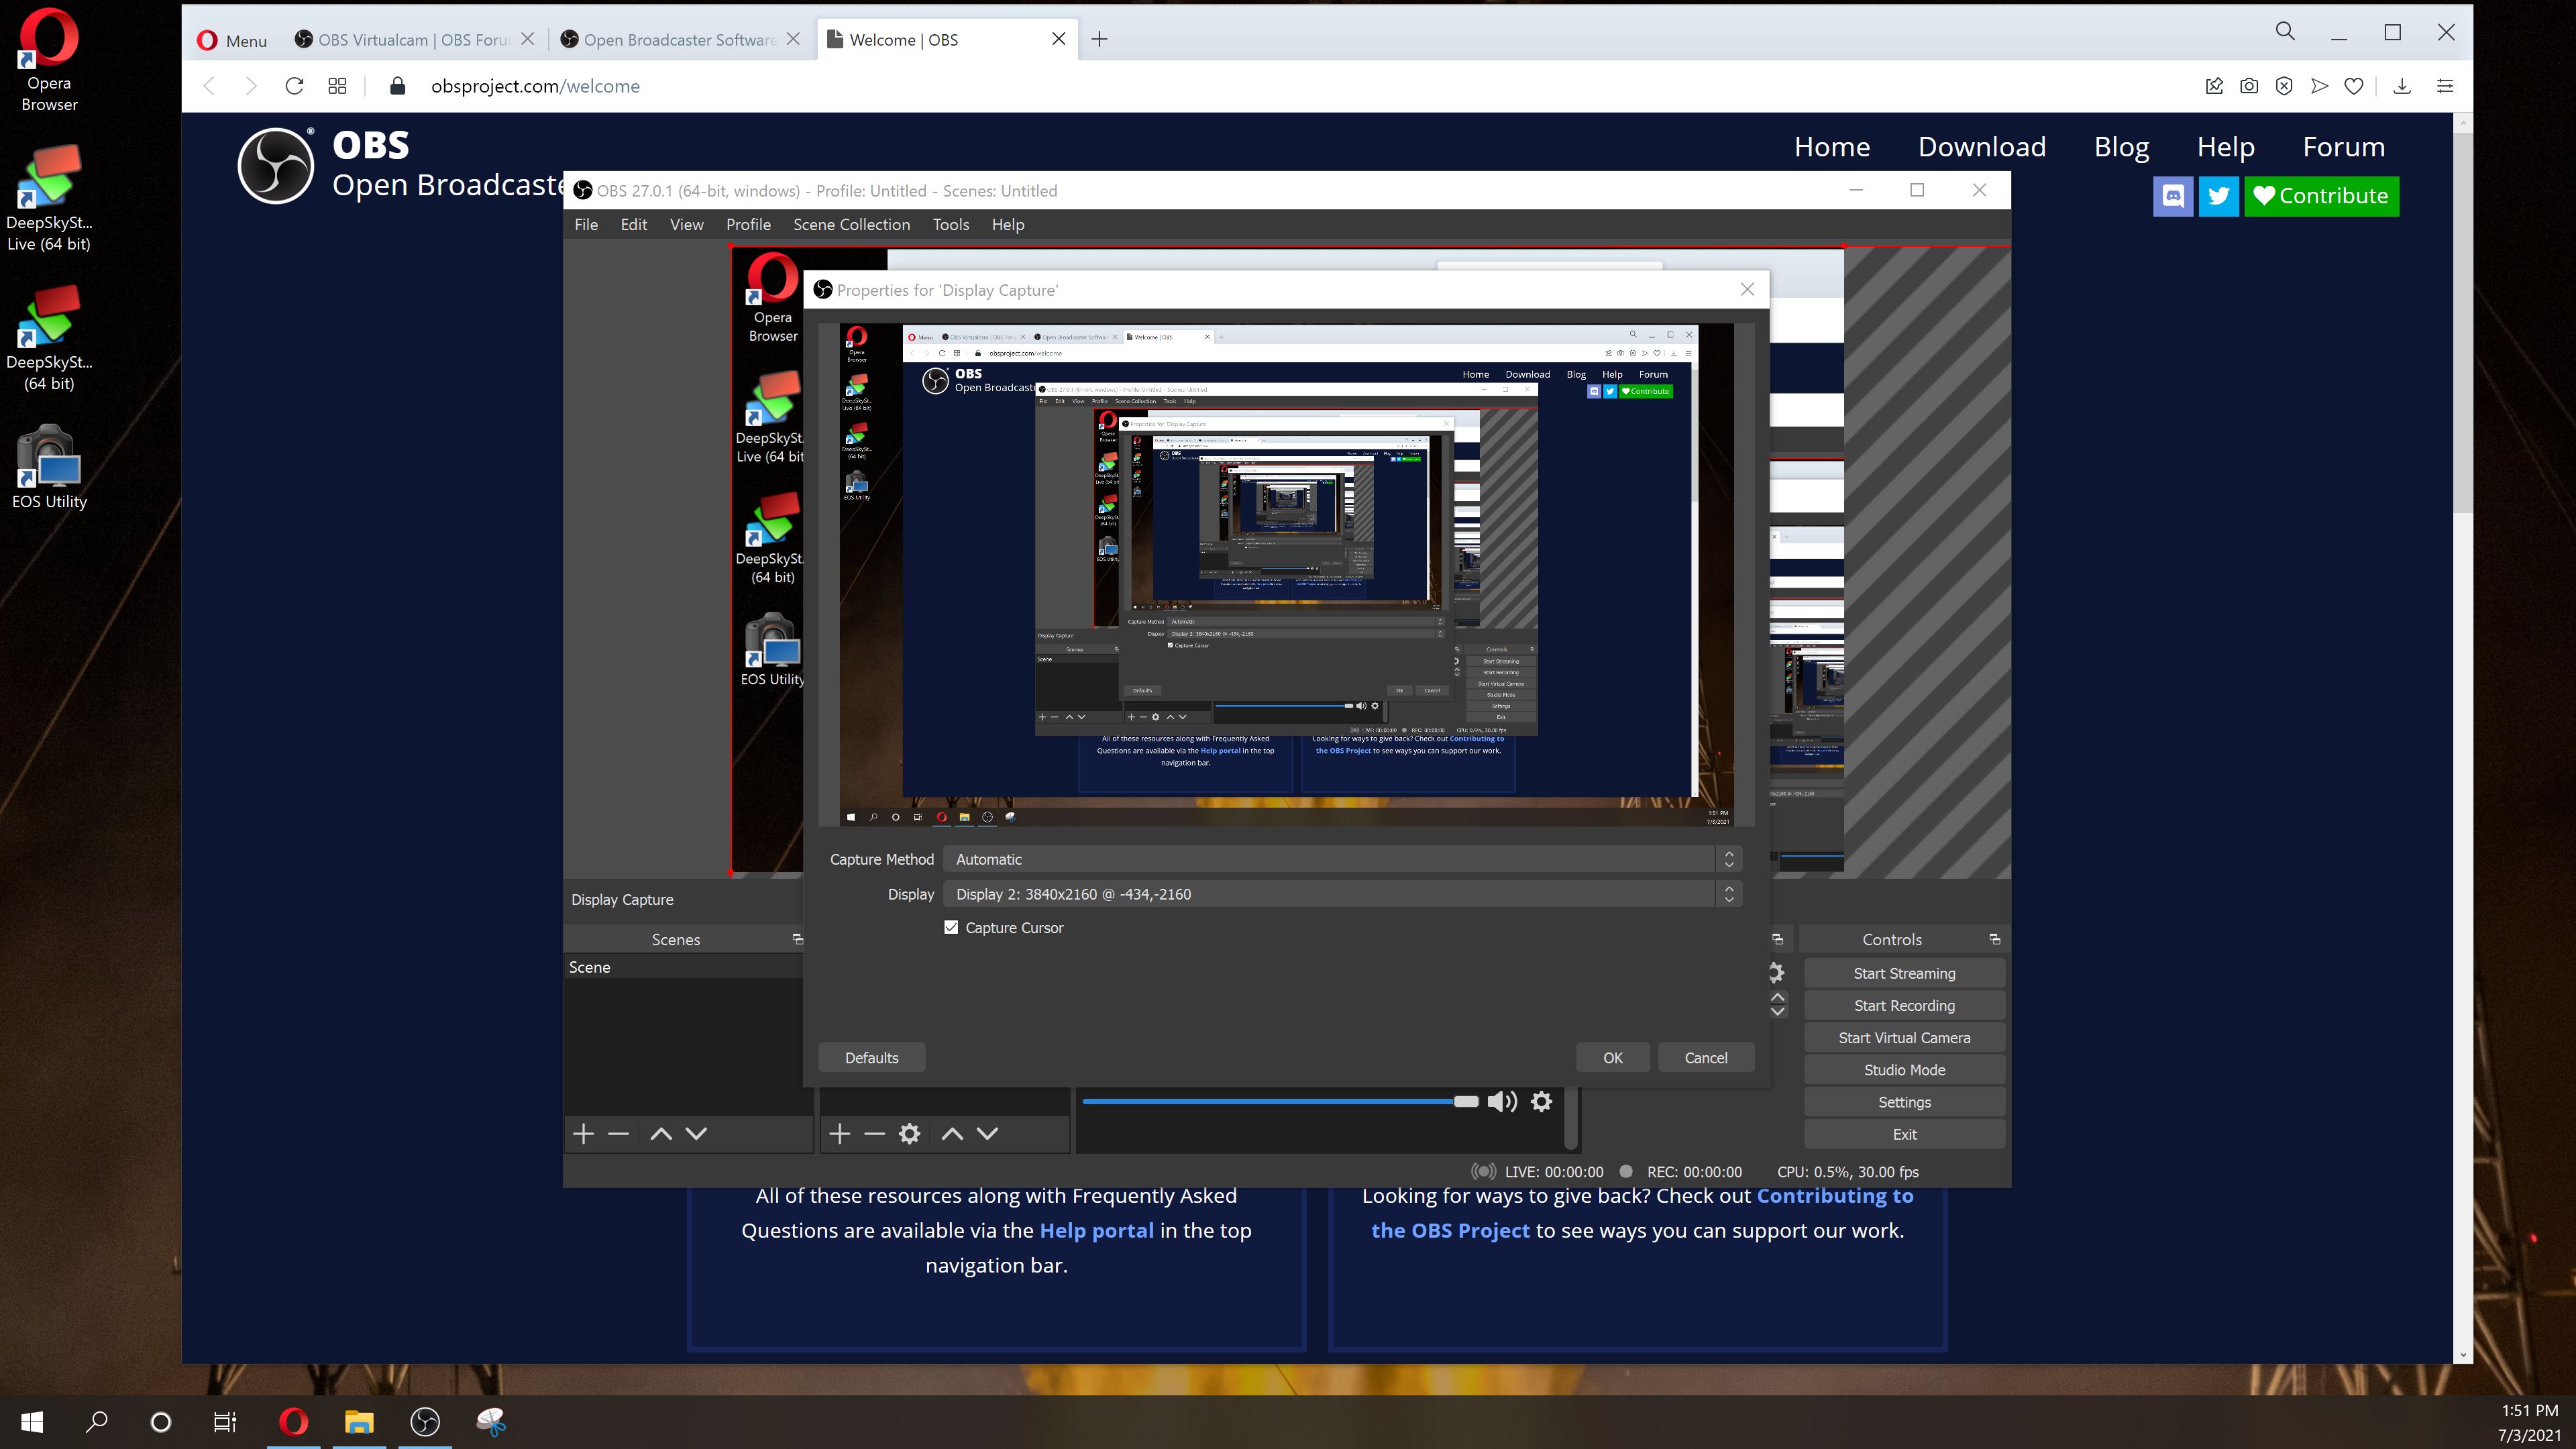
Based on the resolution of your display, you may need to adjust the size of the display capture to fit the window. Just click and drag on the red corners to make it fit, then click “Start Virtual Camera” toward the bottom right corner.
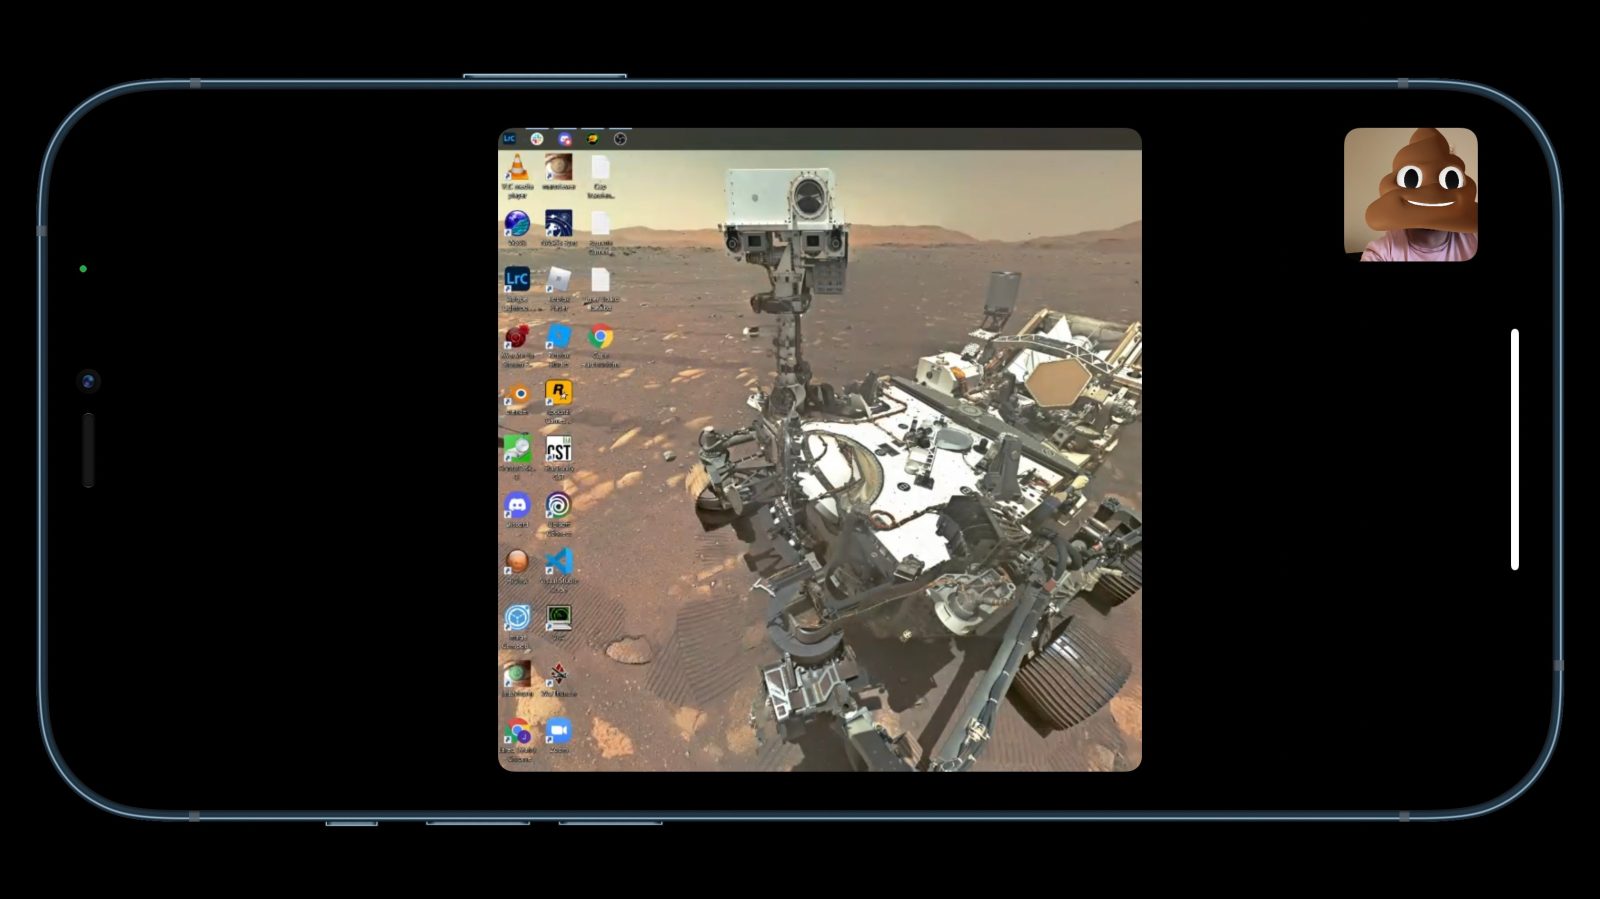
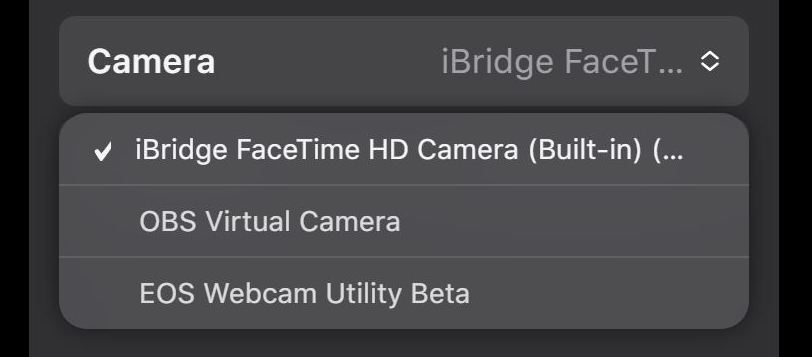
Selecting the screen capture in FaceTime
After joining a FaceTime call from a link on a Windows computer, click on the three dots in the lower left hand corner to open the settings. Under camera select “OBS Virtual Camera” to start sharing your screen.
FaceTime automatically takes the non-square video, and crops it to a square before sending it across FaceTime. You can scale down the screen capture in OBS further to show the whole screen, but then you’re adding black bars on top and below your video, so it’s a personal preference based on what you would like to share.

If you test this method and find it useful, let us know in the comments! iOS 15 is currently in beta and will be available publicly this fall.
FTC: We use income earning auto affiliate links. More.


Comments