
Whether you just need to take the occasional screenshot on Mac, are a power user with an advanced workflow, or somewhere in-between, follow along for how to screenshot on Mac with the free built-in macOS tools or with third-party software. We’ll look at keyboard shortcuts, tips and tricks, advanced options, and customizations.
With macOS Mojave and later, Macs got a hidden Screenshot app with more advanced controls like a timer, save to destination choices, show/hide mouse pointer, remember last selection, screen recording control, and more.
The great part about that is the improved screenshot functionality is free for all Mac users with no app to download.
Table of contents
However, if you’re looking for even more advanced ways to screenshot on Mac, a third-party app will be the way to go. We’ll cover both below.
How to screenshot on Mac: From basics to advanced
Screenshot on Mac with macOS built-in tools
Shortcuts, tips, and tricks
If you don’t know them or need a refresher, here are the keyboard shortcuts to screenshot on Mac:
- Entire screen: shift + command + 3
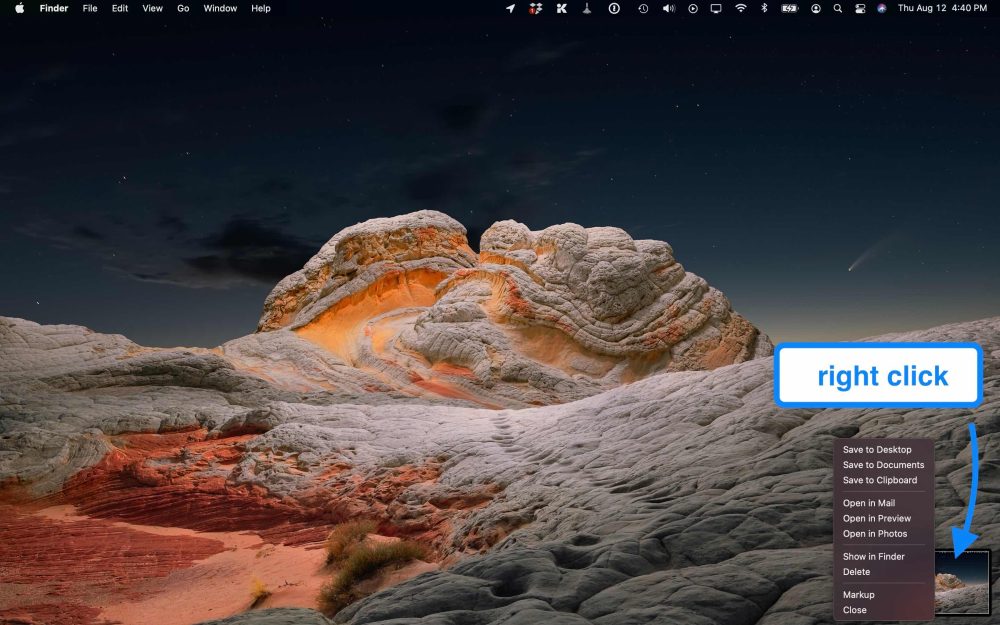
- By default you’ll see a thumbnail of your screenshot in the bottom right corner of your Mac
- You can:
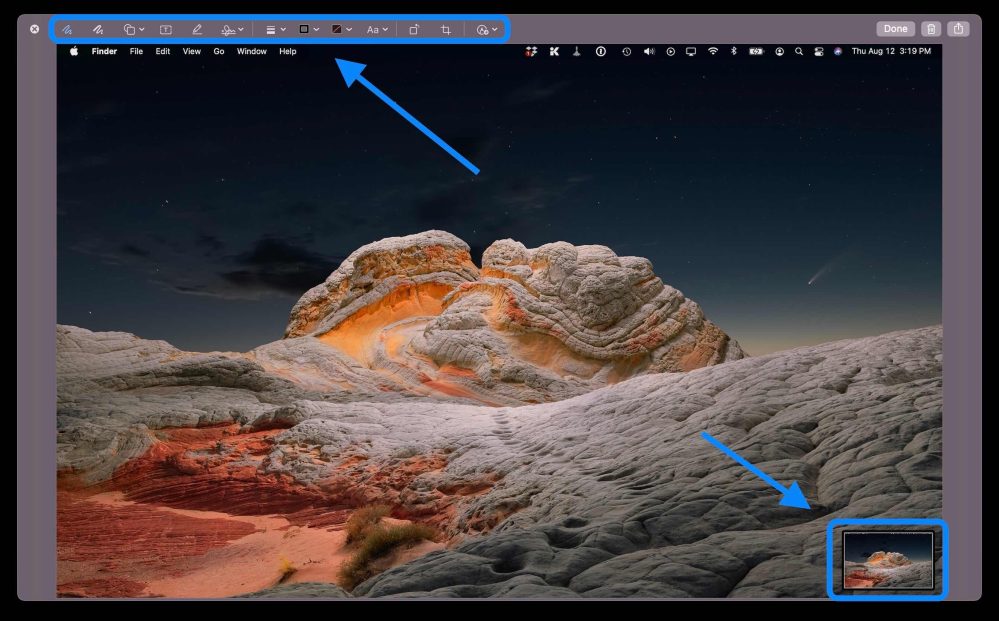
- Click on it to edit the screenshot
- Right click on it to get more options
- Swipe on the thumbnail to dismiss it (keep reading for how to disable thumbnails)
- Wait a moment for it to be saved to your desktop
- Add the control key while taking a screenshot to copy it to your clipboard
- Selected portion: shift + command + 4
- Then use the crosshair with your mouse or trackpad to select the portion you’d like to capture
- You can press and hold the space bar to drag the selected portion
- Press the escape key to cancel the screenshot
- Let go of your mouse button or trackpad to take the selected screenshot
- Add the control key if you want to copy it to your clipboard
- Screenshot a window, menu, the Dock: shift + command + 4 + space bar
- With these screenshots, you’ll see a camera icon appear
- Hover over different windows, the menu bar, menu items, or Dock, a blue highlight will let you know what you’re going to capture
- Click the window or menu to take the screenshot
- You can also hold the option key to remove the shadow border from window screenshots
- Screenshot the Touch Bar on MacBook Pro: shift + command + 6
- Add the control key to the shortcut to copy the screenshot to your clipboard
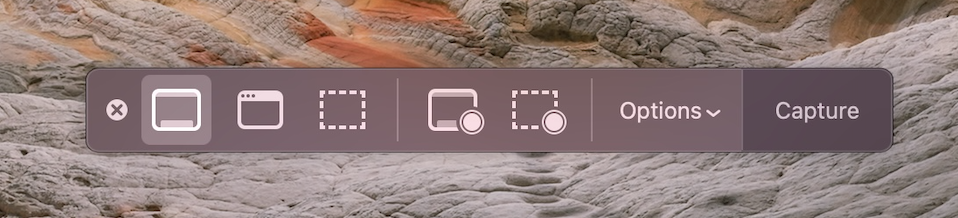
- Open the macOS Screenshot app: shift + command + 5
- Now you’ll see the entire screen, selected window, or selected portion options, as well as the ability to start a screen recording (entire or portion), “Options,” and “Capture”
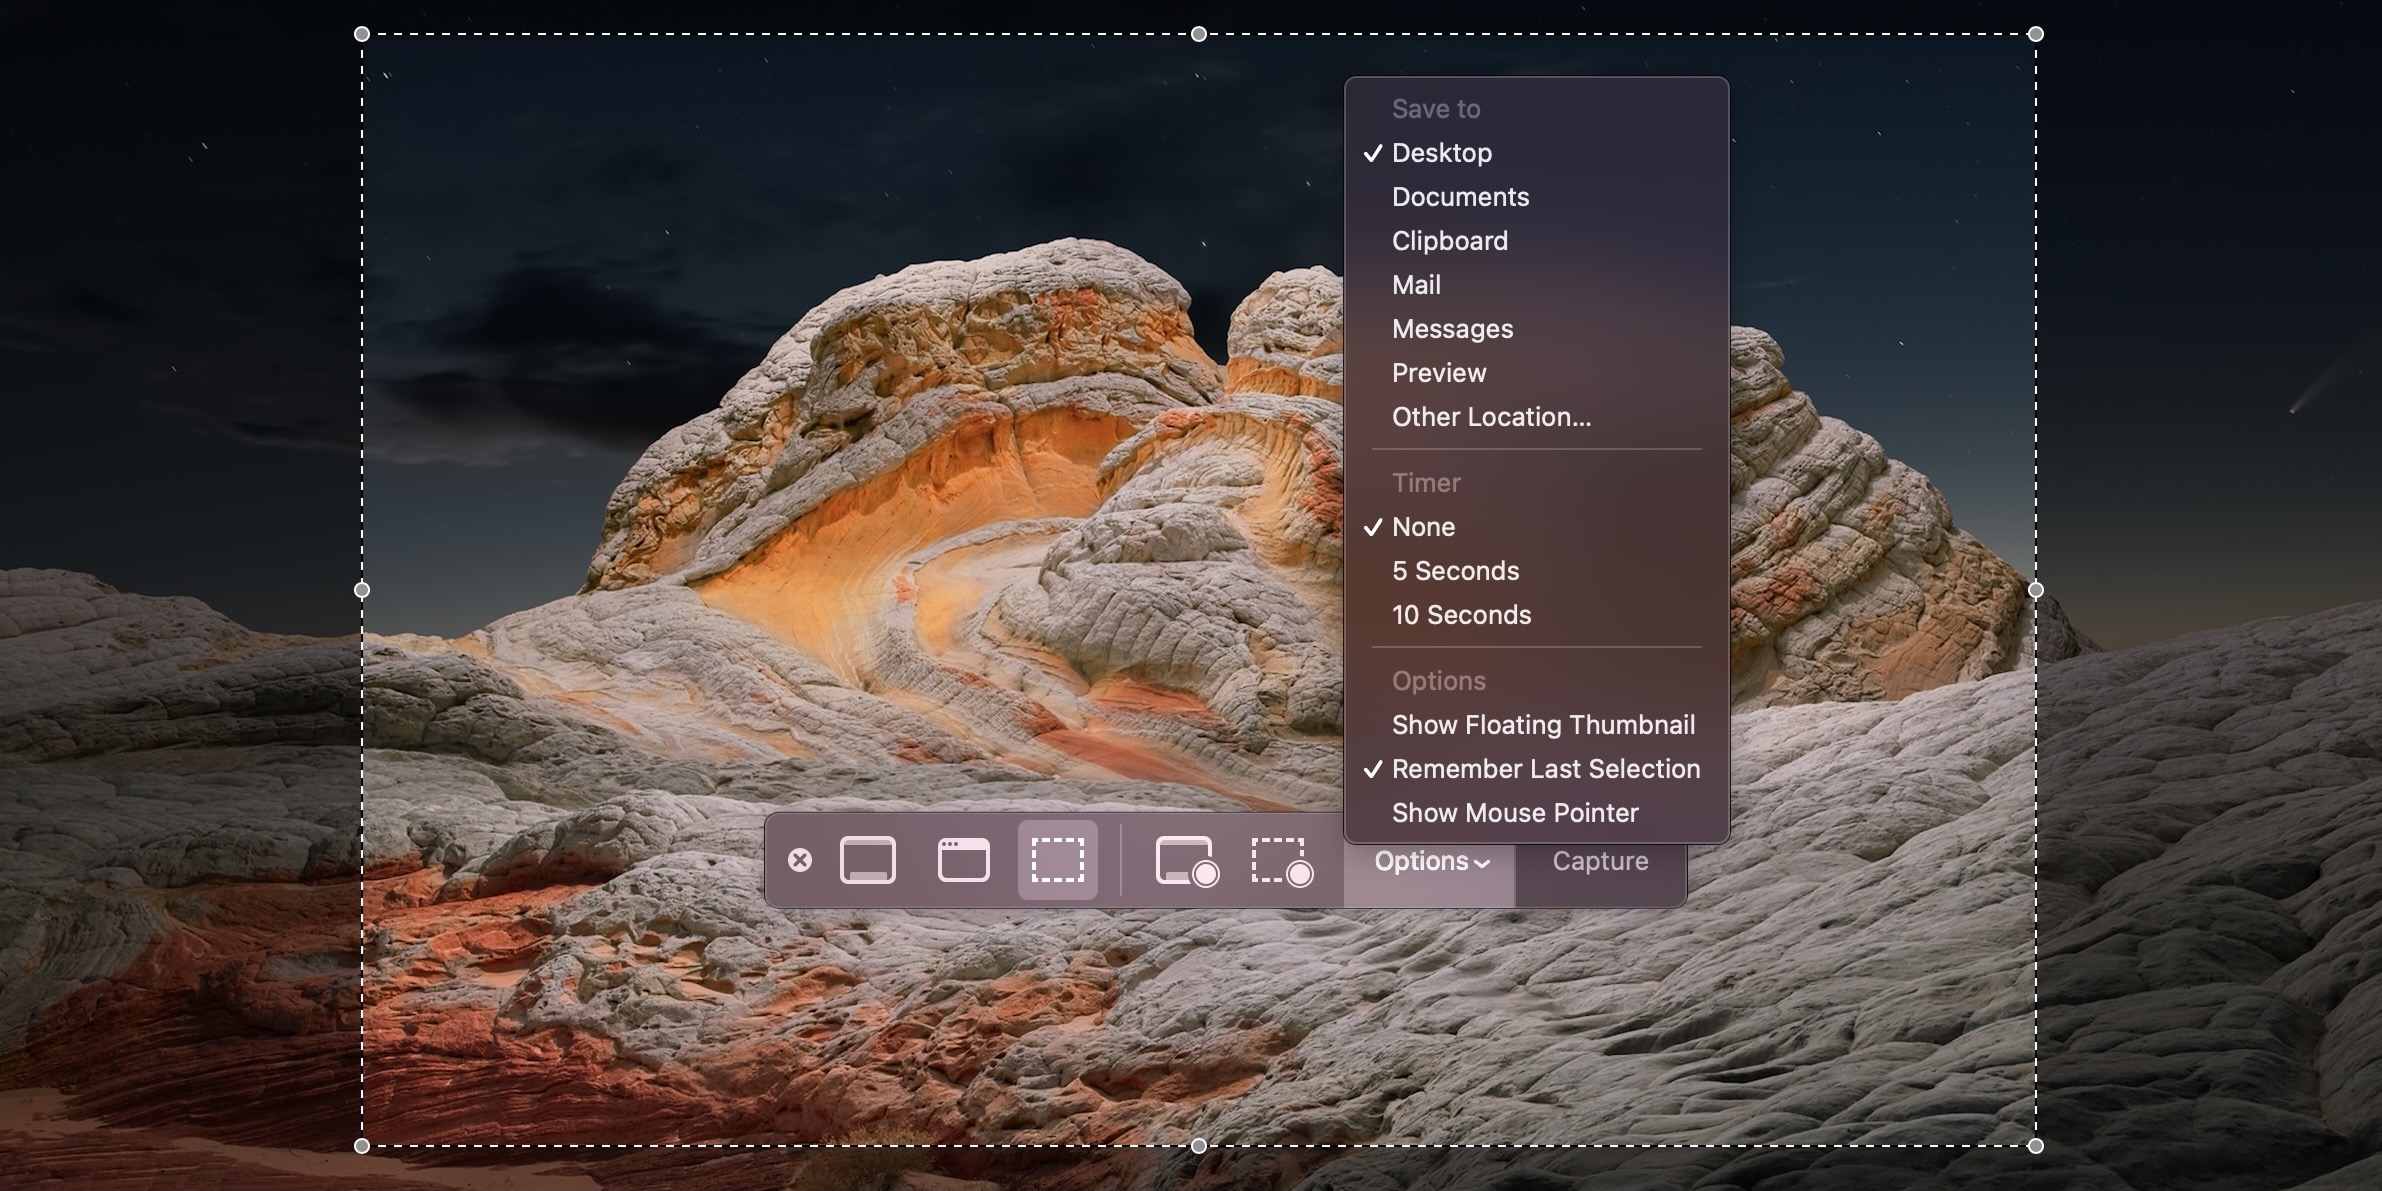
- Click Options to customize your screenshot preferences
- These include a timer, save to options, as well as the ability to disable the floating thumbmail afer taking a screenshot, show/don’t show mouse pointer, and remember last selection
- There’s a Capture button you can use in the menu as well (or press the return key)
- One neat option for quickly taking lots of screenshots is setting a selected portion with the menu, choosing “Remember Last Selection,” then using the shift + command + 5 shortcut followed by the return key which will take the screenshot
Another tip for MacBook Pro users, you get screenshot controls on the Touch Bar when using shift + command + 4 or 5:


A couple of other things to keep in mind, screenshots are prevented in the Apple TV app. And if you want to customize the keyboard shortcuts for screenshots, head to System Preferences > Keyboard > Shortcuts > Screenshots.
Change screenshot default to JPG
By default, screenshots on Mac save to the desktop as PNG files, which tend to be larger files. To change the default to JPG (smaller file sizes), follow these steps:
- Open the Terminal app
- Enter the following command “defaults write com.apple.screencapture type JPG”
- Press return (enter)
Advanced screenshots on Mac with third-party apps
Our top pick for a robust screenshot app for Mac is CleanShot X. The app comes with more than 50 features to allow you to accomplish pretty much anything you can think of when it comes to capturing your screen.
That includes:
- Annotations
- Quck access overlay with quick actions
- Self-timer
- Scrolling capture in addition entire screen, selection, windows, more
- Compatiblity with PixelSnap
- Custom screenshot backgrounds
- Show magnifier with crosshair for selected portion screenshots
- Freeze screen
- Robust screen recording
- Record as GIF
- Auto-enable Do Not Disturb
- Show/Hide cursor
- Hide clutter from desktop when recording
- Capture Clicks
- Capture Keystrokes
- Upload screenshots and recordings and get a link to share with CleanShot Cloud
- Tags
- Team management
- Custom domain and branding
CleanShot X for Mac starts from $29 for 1 Mac as a one-time purchase that includes updates for a year (optional $19 annual subscription for future updates beyond that). And CleanShot Cloud Pro offers all the features including custom domain names and branding, self-destruct control, and more from $8/month per user when paid annually.
Other popular third-party screenshot apps for Mac:
Read more 9to5Mac tutorials:
- Should you buy the iPad Air or the 11-inch iPad Pro?
- Hands-on: Making custom Apple Watch health complications with ‘Complication Lab’
- Apple’s iPhone 12 MagSafe Battery Pack vs. alternatives from Anker and Mophie
- Here’s how to install the macOS Monterey public beta or developer beta
FTC: We use income earning auto affiliate links. More.


Comments